Here's a pic of the front spar with ribs clecoed to it. These will be riveted to the spar, along with several other internal pieces.

This is a shot of the rear spar, all riveted up and ready to go. The grey color is from the self-etching primer that I'm using (NAPA 7220 rattle cans).

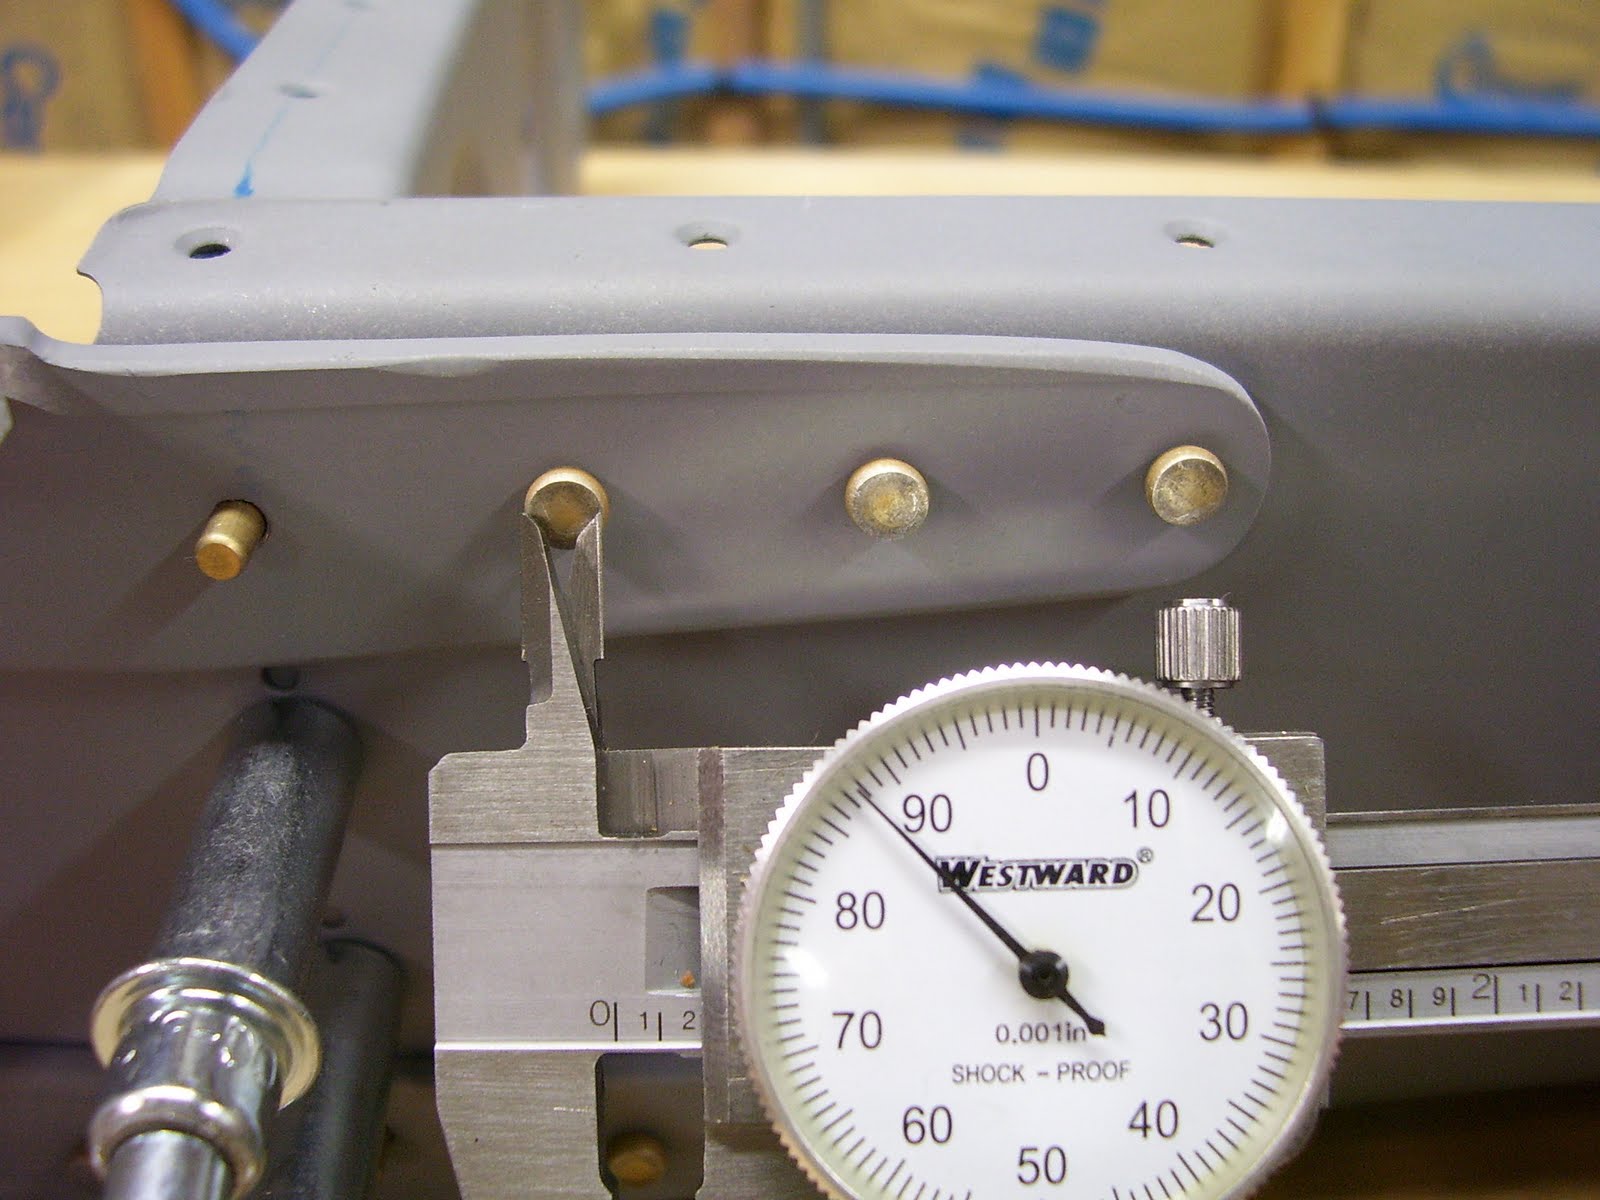
The rivets all came out very nice with my pneumatic squeezer.
And the flush rivets on the skins are looking good aswell- I'm very happy so far. The scuffing on the aluminum is where I had to buff out a scratch. You'll never know when it's painted ;)

The bolts for the elevator hinge bearing are supposed to be tightened to 25 in-lbs, so I got to use my nifty torque wrench. Craftsman brand, seems to be of quality.

I had to temporarily assemble everything,just because it looks so cool. It's big!


The next step is to rivet the internal structure to the skins, which will make the horizontal stabilizer about 1/3 of the way finished. I'll still have the control surfaces to fabricate, the electric trim to install, as well as the fiberglass work for the tips. Lots of work left, and that's just the horizontal part! I'm not complainin'.
Here's Nicole doing some heavy lifting- clecoes! After attaching +-175 of them, my wrists needed a break. Thanks, honey!

I'll keep you posted in a week or so...!
Good think you have good help!
ReplyDeleteDenise